Interaction System Features
Interactions with other elements in the level, such as levers, objects, NPCs or transfers, are possible thanks to an Area2D added to the character. The interaction is managed by a StateInteract state that offers different configurations, such as:
- The interaction area
- The states to enable on interaction
- The states to enable when leaving the interaction area
- Activate the interaction via the input of an action (defined in Input Map)
- Activate the interaction only if all conditions are met (for example: the character must face a certain direction or an item must be in the inventory)
Configuration
Who triggers the Interaction
A character (or any other game element) that initiates an interaction must have:
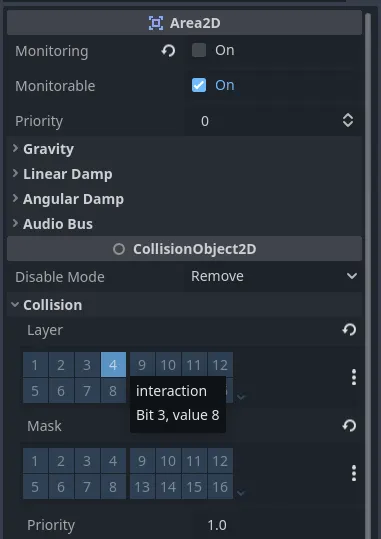
- An
Area2Dnode with themonitorableproperty set totrue. - The
collision_layerproperty of theArea2Dmust match thecollision_maskproperty of anInteractionAreadefined within aStateInteractstate.
The element to Interact with
An element that wants to responds to interactions must meet the following requirements:
- A
StateMachinewith at least oneStateInteractstate enabled.
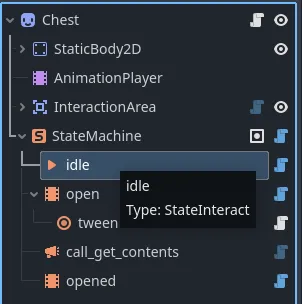
- The
StateInteractstate must have itsinteraction_areaproperty linked to anArea2Dnode. - The
Area2Dnode must have themonitoringproperty set totrue. - The
collision_maskproperty of theArea2Dmust match thecollision_layerproperty of the areas triggering the interaction.

An InteractionArea node is available to quickly add a pre-configured Area2D,
ready to be set as an interaction_area in a StateInteract.
Conditions
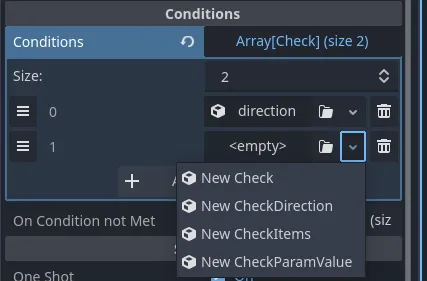
Conditions are a set of rules that must be met to trigger an interaction.
You can add a new condition by adding a new element to the conditions list of a StateInteract state.
You can optionally define a list of states to activate when a condition is not met.
To do this, add a new entry to the on_condition_not_met dictionary, specifying:
- Key: The name of the condition to monitor.
- Value: The State to enable if the condition is not met.
Make sure that the resource_name of the ContentItem resource is set and that the Key of the entry matches it accordingly.

Pre-Built Conditions
- CheckDirection: Ensures the character is facing a specific direction.
- CheckItems: Verifies that the interacting node has an Inventory containing the required items.
- CheckParamValue: Checks if a specific parameter on the interacting node matches a given value.
Custom Conditions
You can create custom conditions by extending the Check class and implementing the check method in your script.
The check method should return true if the condition is met and false otherwise.
You can check the pre-built conditions scripts for reference.