Dialogues in the template are managed using Godot Dialogue Manager (version 3) by nathanhoad . This powerful plugin allows for easy integration of dialogues into your game.
Starting a Dialogue
To trigger a dialogue, call the following function:
DialogueManager.show_dialogue_balloon(resource: DialogueResource, title: String = "")A DialogueResource is required to define the conversation. To create one, open the Dialogue tab in the Godot editor and create a new file.
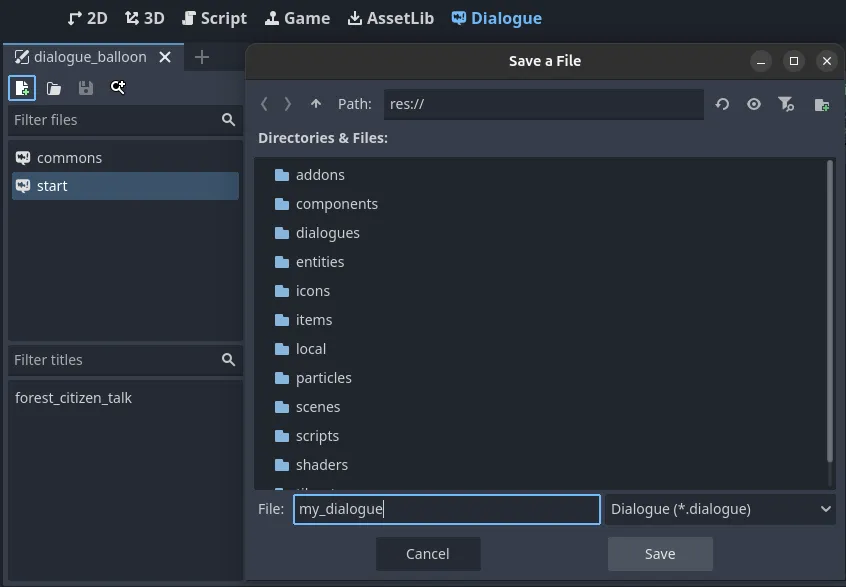
The newly created file serves as the resource that needs to be passed to show_dialogue_balloon.
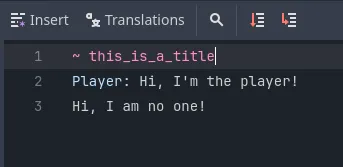
The optional title parameter references a specific dialogue section within the file. Titles must begin with the ~ symbol.
For a full overview of the plugin’s functionalities, check the official documentation or watch nathanhoad explanation video:
Create a Dialogue Sequence
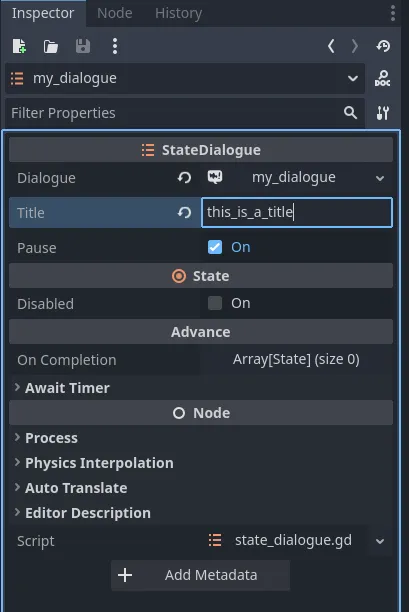
In the template, the best way to integrate dialogues into gameplay is by using the StateDialogue state within a StateMachine .
This state allows you to specify both the DialogueResource and title for the conversation.
Additionally, you can configure it to wait for the dialogue to complete before transitioning to the next state.
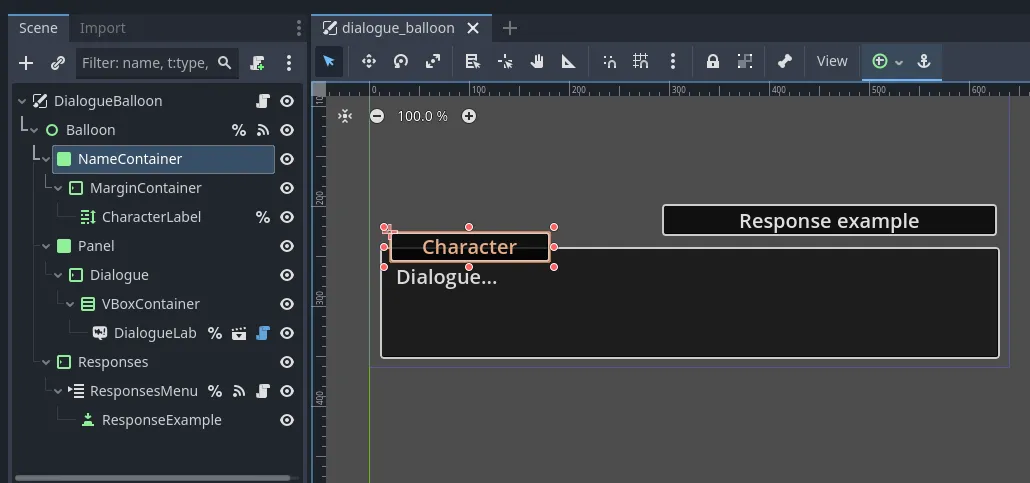
Customizing the Dialogue Balloon
The appearance of the default dialogue balloon can be modified by opening the dialogue_balloon.tscn scene.
The balloon consists of multiple Control nodes that can be adjusted to fit your game’s style.
You can change its visual design, apply a new theme, or override the default one.