Smooth transitions between scenes, such as moving from the title screen to the first level or switching between game levels, enhance the player experience.
This process is handled by the SceneManager autoload from the Godot4 Game Template by baconandgames .
Loading a Scene
To load a scene with a transition effect, simply call the swap_scenes function as follows:
SceneManager.swap_scenes(scene_to_load: String, load_into: Node, scene_to_unload: Node, transition_type: String)The swap_scenes function takes the following arguments:
scene_to_load: The file path of the scene to load.load_into: The parent node where the new scene will be loaded.scene_to_unload: Usually the current scene that needs to be removed.transition_type: The type of transition effect to use.
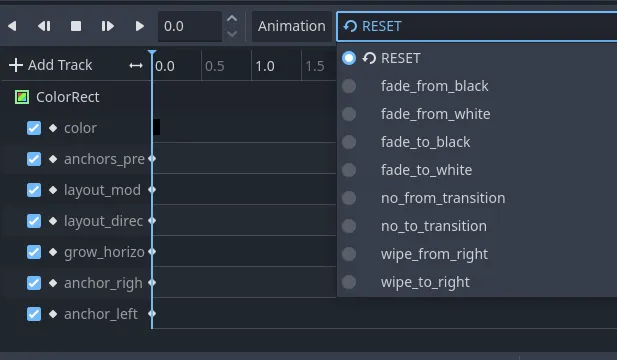
Transition Types
The SceneManager includes several built-in transition effects by default:
fade_to_blackfade_from_blackfade_to_whitefade_from_whiteno_from_transitionno_to_transitionwipe_from_rightwipe_to_right
You’re free to create and add your own transition effects. To do this:
- Open the
loading_canvass.tscnscene. - Add a new animation to the
AnimationPlayernode. - Use the name of the new animation as the
transition_typeparameter when callingswap_scenes.
If loading a scene takes too long, the SceneManager will automatically
display a loading bar. You can customize this loading bar by modifying the
loading_canvass.tscn scene.
For more details about the SceneManager, check out the video by Bacon and Games :
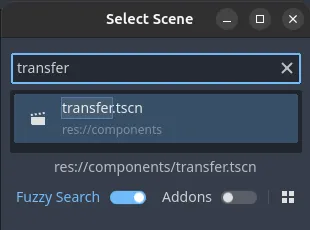
Transfers
The template includes a pre-built scene, transfer.tscn, designed to handle automatic transitions between levels.
To integrate it into a level:
- Add the
transfer.tscnscene to your level. - Position it where you want the transfer to occur.
- Configure the parameters exposed by the
transfer.gdscript.
By default, the level transition is triggered when the player enters the designated InteractionArea.
This interaction is managed by the StateInteract state of a StateMachine .
Each Transfer instance can be customized to fit your level’s needs.
To modify an individual Transfer:
- Right-click on the
Transfernode in the scene hierarchy. - Select Editable Children to access and adjust its properties.

This allows you to define custom conditions for triggering the level transition.
To maintain a well-organized level, it’s recommended to place all Transfers under the designated Transfers node in your level hierarchy.