Autotiles are a special type of tiles that automatically adapt their appearance based on their placement in the map. This system makes mapping easier by dynamically adjusting the edges and corners of terrain-like tiles such as water, grass, cliffs and walls. Instead of placing multiple tile variations manually, auto tiles blend seamlessly to create natural-looking environments.
Setting Up Autotiles
The template includes a handy plugin that allows you to quickly set up Terrain Sets for your Tileset. This is especially useful if you want to design levels using autotiles.
With the TileBitTools plugin by dandeliondino , configuring an autotile is quick and easy:
- Create a new node of type
TileMapLayer.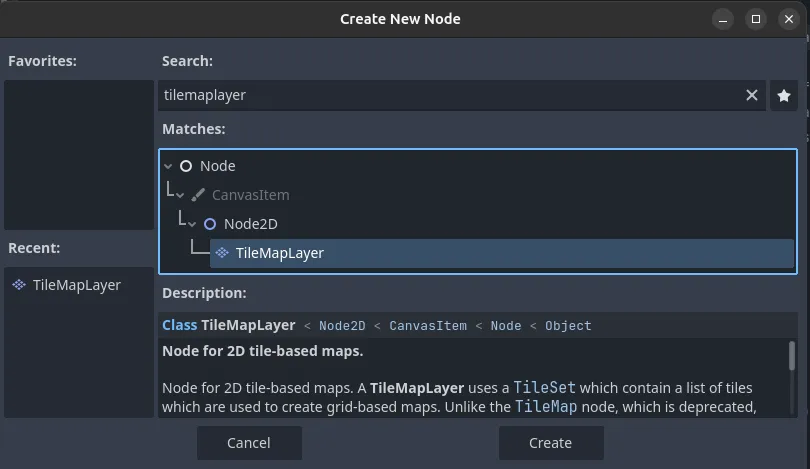
- Select the newly added
TileMapLayerand create a newtile_set.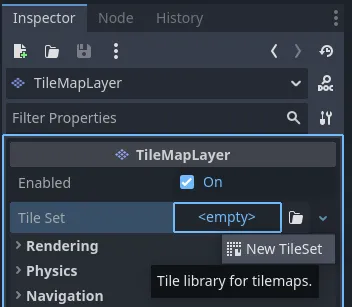
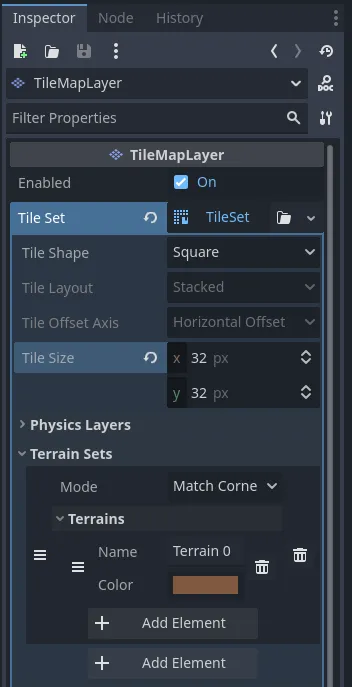
- Click on the newly created Tile Set, expand the Terrain Sets section, add a new terrain and then add a new element.
- Select the TileSet tab, add a new Tile Source of type Atlas and go to the Select tab.
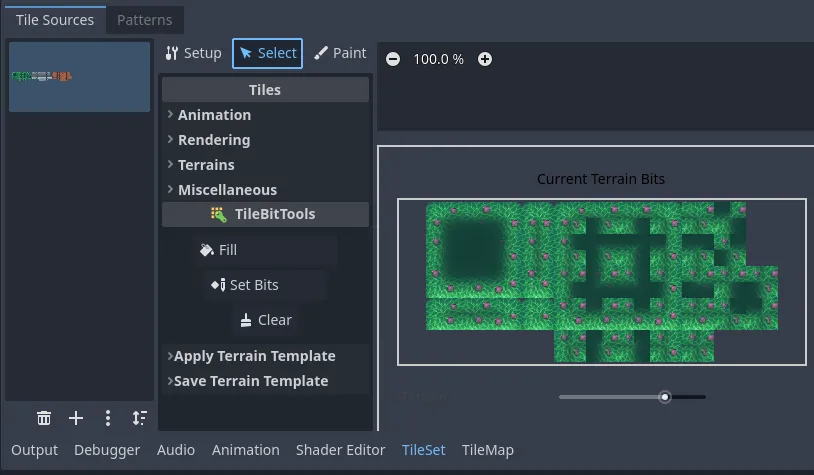
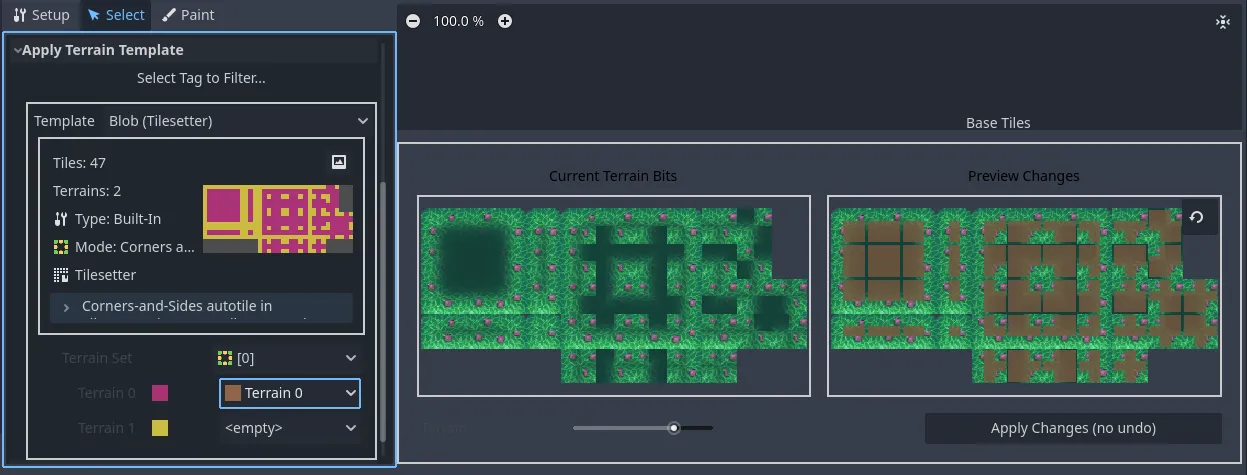
- In the Select tab:
- Select all your tiles.
- Navigate to the TileBitTools section (if it doesn’t appear automatically, switch tabs and then return to Select).
- Expand Apply Terrain Template and choose the template that matches your tileset.
- Select the terrain created in step (3) and click Apply Changes.
- Now, go to the TileMap tab, open the Terrains section and select the terrain you just created.
You can now draw in yourTileMapLayerusing autotiling!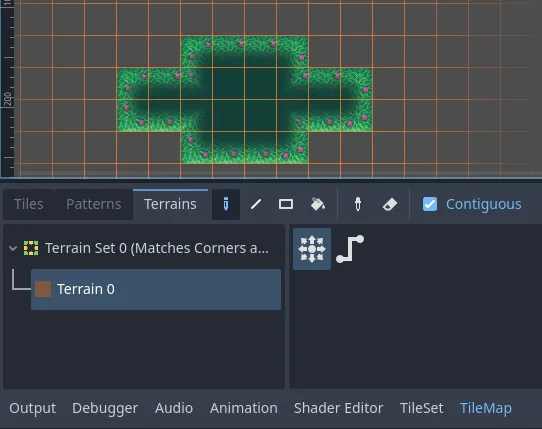
When creating a new TileSet, make sure to correctly set the tile_size value
according to the dimensions of your tiles.
Creating a New Level
The template includes a Level.tscn scene that serves as a starting point for creating all your game levels.
To create a new level:
- Locate
Level.tscnin the FileSystem. - Right-click on it and select “New Inherited Scene”.
- This will create a new scene based on
Level.tscn, inheriting all its nodes and structure.
Level Structure
A Level.tscn scene is organized as follows:
- GameCamera2D: The main game camera, with the
game_camera.gdscript attached, which allows it to follow a specified target. - Layers: Contains all
TileMapLayernodes. - Props: Contains the decorative elements and environmental props.
- Entities: Contains all level entities, including the player, NPCs and enemies.
- Transfers: Contains level transition nodes. Check the Scenes Transition page to learn more about Transfers.
- Events: Contains level-specific events, typically structured using a State Machine .
These nodes help maintain a structured and organized level layout,
with the exception of GameCamera2D and the parent node Layer
(which you can name whatever you like to identify your level) and which contains the level.gd script, responsible for initializing the player upon entering the level.
Pre-built Layers
The Layers node is particularly important as it contains several pre-configured TileMapLayer nodes for level design.
The TileMapLayer nodes are structured as follows:
- terrain: The base ground layer.
- water: Used for water or other elements that sit above the base terrain.
- terrain2: A secondary terrain layer, useful for elements like shadows or additional details.
- walls: Defines walls and solid structures.
- top: The highest layer in the hierarchy. This layer always appears above characters, props and other elements.
You are free to configure the pre-built layers as needed, starting from
Level.tscn, keeping in mind that in your inherited levels you can
add new layers but you cannot remove the existing ones.
Adding Players to the Level
Players are added to the level through the P1 node, a Marker2D node with the player_instantiator.gd script attached.
This node determines where a player will be placed within the level.
If your game supports multiple players, you can duplicate this node to spawn additional players, ensuring that each one has a unique player_id.
The player_instantiator.gd script takes care of instantiating a player at the Marker2D position with the assigned player_id.
Although you can manually instantiate the player.tscn scene, it is
recommended to use this node for better management of player_id assignments
and to maintain consistency in player handling.